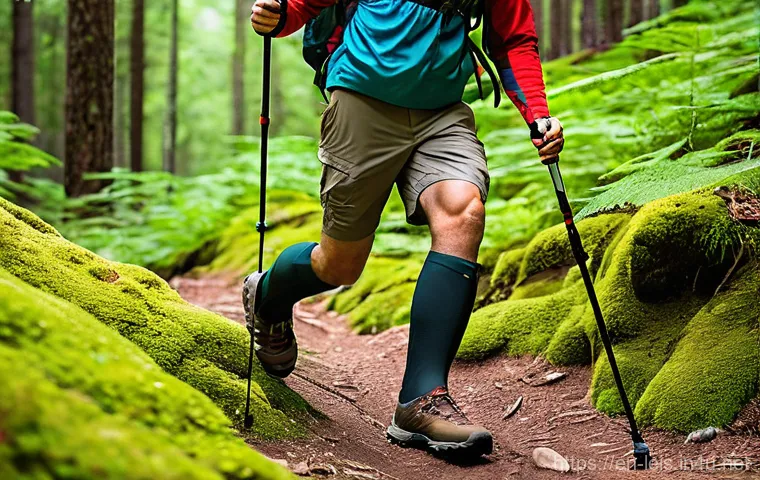
Hey fellow adventurers! Let me tell you, there’s nothing quite like the feeling of hitting a challenging trail, pushing your limits, and soaking in those incredible views.
But honestly, for far too long, I resisted the idea of using hiking poles. I thought they were just for ‘serious’ trekkers or, worse, something that would slow me down.
Big mistake! Once I finally embraced them, my entire hiking experience transformed. Those grueling uphill climbs felt easier, my knees thanked me on every steep descent, and I even found myself moving with more rhythm and confidence across varied terrain.
It’s not just about balance anymore; it’s about optimizing your energy, extending your endurance, and protecting your joints for years of adventures to come—a true game-changer for anyone wanting to get more out of their time outdoors.
If you’re ready to unlock this secret weapon and truly elevate your outdoor game, then you’re definitely in the right place. Let’s dive deeper into how to master your hiking poles for an unforgettable journey!
Getting Acquainted: Unlocking the True Potential of Poles
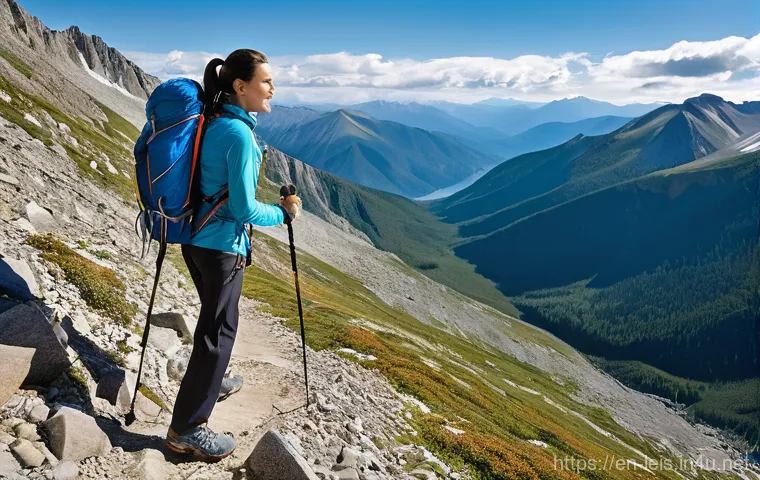
Okay, so you’ve finally decided to give hiking poles a shot, or maybe you’re just curious about what all the fuss is about. Believe me, I was a skeptic for years, thinking they were just extra weight or a prop for the ‘serious’ hikers. Boy, was I wrong! The moment I truly learned to integrate them into my stride, it was like a lightbulb went off. It’s not just about balance – although that’s a huge plus on those wobbly stream crossings or loose scree. It’s about converting your upper body strength into forward momentum, taking some of the strain off your legs, and essentially becoming a more efficient, multi-limbed trail-conquering machine. I remember my first long-distance trek in the Rockies after I finally committed to using poles. My quads, which usually screamed for mercy by mile five, felt surprisingly fresh much later into the day. That experience alone made me a lifelong convert. It’s a subtle shift, but once you get the rhythm, it feels incredibly natural, like an extension of your body, providing a stable, reliable contact point with the earth that enhances your natural balance and propels you forward.
The Initial Setup: Getting Your Length Just Right
This is probably the most crucial first step, and honestly, a lot of people get it wrong. It’s not a one-size-fits-all situation, and what works on flat ground might not be ideal for a steep ascent. A general rule of thumb for flat or gently rolling terrain is that your elbow should form roughly a 90-degree angle when your pole tip is on the ground and your hand is on the grip. Most adjustable poles have measurement markings, making this super easy to dial in. I always start here, on flat ground, setting my baseline. But here’s a pro tip from countless hours on the trail: don’t be afraid to adjust mid-hike! For steep uphills, I’ll often shorten them by a few inches to allow for a more powerful push, keeping my arms from extending too high. On the flip side, for those knee-jarring descents, I’ll lengthen them a bit to give myself more reach and stability, effectively extending my base of support and taking some of that impact away from my knees. Getting this right changes everything, I promise you.
Mastering the Grip and Strap: It’s More Than Just Holding On
Okay, let’s talk about how you actually hold these things. I see so many folks just gripping the handle like a baseball bat, white-knuckled and tense. That’s a recipe for hand fatigue and wasted energy! The strap isn’t just there to keep you from dropping the pole; it’s actually a vital part of your leverage system. You want to slide your hand up through the bottom of the strap, then bring your hand down over the top of the strap and grasp the grip along with the strap. This creates a sort of sling that supports your wrist, transferring power from your arm directly into the pole without needing to constantly clench your fist. It’s a subtle adjustment, but once you feel that connection, you’ll realize how much more relaxed and efficient your pole plant becomes. On long days, this simple technique saves so much energy in my hands and forearms. I’ve been on multi-day treks where the difference between proper and improper strap usage felt like night and day for my hand comfort.
Finding Your Rhythm: The Dance of Poles and Paces
Once you’ve got the setup dialed in, it’s all about finding your natural cadence. Don’t overthink it at first; just let your body move. For most general hiking, I find a diagonal stride works best: left foot, right pole; right foot, left pole. It feels incredibly natural, almost like an extension of how we swing our arms when we walk normally, but with added propulsion and stability. This rhythm helps distribute the workload, engaging your upper body and core in a way that truly propels you forward, making you feel lighter and more agile, especially when carrying a pack. I remember one time, struggling up a particularly long and relentless incline in the Smokies, feeling my legs burning. My hiking buddy, who’s a total pole maestro, just reminded me to “feel the rhythm, not the effort.” Once I stopped fighting against myself and just let the poles flow with my steps, I found this surprising reserve of energy. It’s a mind-body connection that transforms a grueling climb into something almost meditative.
The Diagonal Stride: Your Go-To Technique
This is the bread and butter for most hikers on varied terrain. As one foot moves forward, the opposite pole plants down. Think of it like cross-country skiing, but without the skis! This technique creates a balanced, stable platform with every step. The key is to let your arms swing naturally, pushing off the poles with just enough force to assist your momentum without feeling like you’re doing a full-body workout with every step. The poles should feel like they’re helping you “float” over the trail rather than constantly pushing. When I’m covering long distances on relatively flat or rolling trails, this diagonal rhythm is my absolute favorite. It conserves energy remarkably well and helps maintain a steady pace, reducing the impact on my knees and hips over hours of walking. It’s a beautiful, efficient system once you let your body fall into it, and you’ll find yourself covering ground with surprising ease.
The Double Plant: Powering Through the Tough Stuff
Sometimes, the trail throws you a curveball. A really steep section, a scramble over boulders, or a particularly precarious stream crossing. That’s when I switch to the ‘double plant’ – planting both poles simultaneously in front of me. This offers a powerful, stable brace. I use it to push off forcefully for a challenging step up, or to provide maximum stability when descending a particularly sketchy patch. It’s a more deliberate movement, less about rhythm and more about controlled power and balance. I’ve found this technique invaluable on those moments when I need a little extra oomph or an emergency brake. For instance, scrambling over a fallen log that’s a bit too high for a graceful step-over, or navigating a very narrow ridge with a steep drop-off on either side – planting both poles provides that immediate, confidence-boosting stability that allows me to make a controlled, strong movement. It truly feels like having four legs for a moment, and it’s a lifesaver in those “oh snap” moments.
Ascending with Authority: Conquering Uphills with Pole Power
Uphill climbs used to be my nemesis. My legs would burn, my lungs would ache, and my pace would slow to a crawl. But once I truly embraced my poles for ascents, it was a total game-changer. Think of your poles as extra limbs, extending your reach and providing additional points of contact to push yourself upwards. It’s all about using your upper body and core to assist your legs, distributing the workload and allowing you to maintain a more consistent, less fatiguing pace. On a recent trip to Patagonia, tackling some of those relentless, long ascents, my poles were my absolute best friends. I saw other hikers struggling, leaning on their knees, while I was able to maintain a steady, almost rhythmic climb, thanks to the power generated by my poles. It saves so much energy in your quads and hamstrings, letting them focus on the primary task of lifting your body, while your arms and shoulders contribute significantly to the propulsion.
Shortening for Strength: Maximizing Your Push
When the incline gets serious, I always shorten my poles a few inches. This allows me to plant them closer to my body and push down more effectively, almost like doing a mini push-up with each step. It keeps my hands and arms in a more powerful, ergonomic position, preventing me from over-extending my reach and losing leverage. Imagine trying to push a heavy object with your arms fully extended versus having a slight bend – the latter gives you so much more power! This subtle adjustment means every push counts, and I can really lean into the poles, driving myself upward. On those steep sections, where every foot of elevation gain feels like a monumental effort, this technique is a lifesaver. It transforms a grueling grind into a more manageable, controlled climb, and I can feel the power surge from my core through my arms and into the poles, propelling me forward.
The Swing and Plant: Building Momentum
For more moderate ascents, I like to use a slightly more dynamic “swing and plant” motion. Instead of just planting the pole directly beside my foot, I’ll swing it forward a bit more aggressively, planting it slightly ahead of my forward foot, and then push through it as my foot comes up to meet it. This creates a powerful, forward-driving motion, helping to pull me up the hill rather than just push. It’s a more fluid, momentum-driven technique that works wonderfully on long, consistent climbs. It feels like you’re actually gaining ground with each pole plant, and it helps maintain a quicker pace without feeling like you’re expending extra energy. I’ve found this particularly effective on rolling hills where you want to keep your speed up without completely exhausting your leg muscles.
Descending with Grace: Protecting Your Joints and Building Confidence
Ah, descents. For many, this is where the real pain kicks in, especially for your knees. The repetitive impact, the constant braking, the fear of slipping – it all adds up. But this is another area where hiking poles truly shine. They act as shock absorbers, taking a significant portion of the impact off your knees, ankles, and hips. More than that, they provide vital stability, giving you two extra points of contact with the ground, which drastically reduces your chances of a fall on loose or uneven terrain. I used to dread long descents, knowing the ache that would follow, but now, with poles, I actually *enjoy* them. It’s a freeing feeling to confidently navigate down a steep, rocky trail, knowing I have that extra support system. It’s not just about speed; it’s about safety, preservation, and extending your hiking career for years to come.
Lengthening for Reach: Spreading the Impact
Just like shortening for ascents, lengthening your poles is crucial for descents. I typically extend them by a few inches beyond my normal flat-ground setting. This allows me to plant them further ahead of my body, creating a larger, more stable base of support. When I step down, I can lean into the poles, absorbing a significant amount of the impact through my arms and shoulders, rather than letting it all hammer my knees. It’s like having a little personal braking system! This technique also helps you maintain better balance, especially when dealing with loose rocks or slippery mud. On a particularly steep and long descent in Zion National Park, I watched hikers without poles gingerly pick their way down, often slipping, while I felt incredibly secure, rhythmically planting my extended poles and almost gliding down, feeling much less strain. It really makes a difference for knee longevity.
The Controlled Slide: Trusting Your Poles
On very steep, loose terrain, like scree fields or sandy slopes, sometimes it’s less about individual steps and more about a controlled slide. Here, your poles become indispensable for maintaining balance and controlling your speed. I’ll often plant my poles firmly, slightly wider than my shoulders, and then take small, shuffling steps, letting my feet slide a bit, all while using the poles as a stable brace. This isn’t about powering down; it’s about minimizing uncontrolled falls and distributing your weight. It takes a bit of trust in your gear, but once you get the hang of it, it’s an incredibly efficient and safe way to descend challenging sections. It’s exhilarating when you master that controlled descent, feeling the gravel shift beneath your feet but knowing your poles have your back, keeping you upright and in control.
Navigating Tricky Terrain: Stability When You Need It Most
Not every trail is a perfectly groomed path. Sometimes you’re scrambling over roots, crossing slippery boulders, or traversing narrow ledges. These are the moments when poles stop being just helpful and become absolutely essential. The added points of contact with the ground provide unparalleled stability, turning precarious situations into manageable challenges. I can’t count the number of times my poles have saved me from a nasty fall, especially during river crossings or on muddy, off-camber sections of trail where a misstep could lead to a twisted ankle or worse. It’s an immediate confidence booster, allowing you to move with more certainty and less hesitation, which ultimately makes your hiking experience safer and more enjoyable. It really feels like having an extended sense of touch, probing the ground ahead for stability before committing your full weight.
Crossing Water: The Ultimate Test of Balance
Stream crossings, especially those with slippery rocks or a swift current, can be intimidating. This is where your poles earn their keep. I always plant my poles slightly upstream from where I want my feet to go, using them as anchors against the current. This creates a stable triangle of support with my feet, allowing me to carefully pick my way across without feeling like I’m going to be swept away. For wider crossings, I’ll sometimes use them like outriggers, one pole planted on either side of my body for maximum balance. It’s amazing how much more secure you feel with those two extra points of contact, particularly when the water is murky, and you can’t see the bottom. I remember a particularly challenging crossing in the Scottish Highlands where the rocks were like glass. Without my poles, I’m convinced I would have taken an unplanned dip. They literally kept me upright and dry.
Mud, Roots, and Rocks: Maintaining Surefootedness
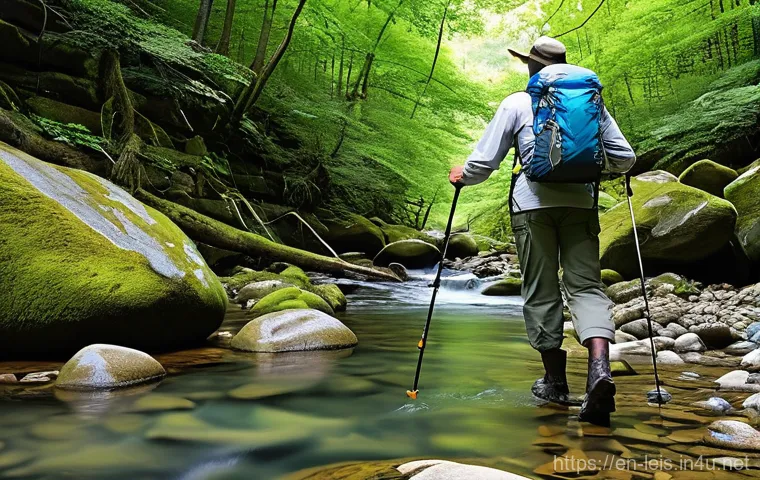
Trails are rarely pristine, and you’re bound to encounter sections with deep mud, tangled roots, or an endless field of uneven rocks. Here, poles provide invaluable support. For mud, they help you test the depth before committing your foot, and then provide a powerful brace to pull yourself out if you sink a bit. For roots and rocks, they help you maintain balance and can even be used to clear a path or test the stability of a wobbly stone before you step on it. It’s like having two extra, very long fingers to feel out the terrain ahead. This anticipatory probing is something I started doing intuitively after a few nasty trips, and it’s a habit that has undoubtedly saved me from numerous falls and sprained ankles. My poles have become my eyes on the ground, especially when I’m looking up to enjoy the scenery.
The Unsung Heroes: Unexpected Benefits and Creative Uses
While the primary role of hiking poles is to aid in stability and propulsion, their utility extends far beyond just walking. Over my years on the trail, I’ve discovered a myriad of creative and incredibly useful ways these simple tools can enhance the entire outdoor experience. From setting up camp to providing a quick fix for unexpected situations, my poles have proven to be versatile companions, constantly surprising me with their adaptability. They’re not just for hiking; they’re truly multi-functional adventure tools that can make your time in the wilderness more comfortable, safer, and more enjoyable in ways you might not have initially considered. It’s this unexpected versatility that makes them such an indispensable part of my gear kit, solidifying their status as more than just walking aids, but as true outdoor companions.
Impromptu Shelter and Support: More Than Just Walking Aids
Ever found yourself caught in a sudden downpour without a proper shelter? Your hiking poles can come to the rescue! With a tarp and a little ingenuity, they can be quickly converted into excellent tent poles, providing the structure for an emergency shelter. I’ve personally used this trick more than once when unexpected weather rolled in, turning a potentially miserable situation into a cozy (if temporary) refuge. Beyond shelter, they can also act as a support for injured companions, creating a makeshift splint or even a basic stretcher with enough creative bundling. I’ve seen them used to prop up a heavy pack during a trailside lunch break, keeping it clean and easily accessible, or even as a flag pole to mark a specific spot. Their rigid structure makes them surprisingly versatile when you need to improvise a solution in the backcountry.
Critter Defense and Trail Clearing: Your Extended Reach
While I hope you never need to use them in a defensive situation, poles can provide a crucial sense of security against curious wildlife. A sudden loud bang on the ground with a pole can often deter overly friendly or territorial animals from getting too close. More commonly, though, I use them as an extension of my arm to clear spiderwebs, push aside thorny bushes that might scratch my face, or test the depth of a suspicious-looking puddle without getting my boots soaked. They’re excellent for poking and prodding unknown obstacles on the trail, giving you a safe way to interact with your environment without direct contact. I once used my pole to gently nudge a snake off the trail, giving it plenty of space while ensuring I didn’t get too close myself. It’s these little, practical uses that make them so valuable day in and day out on the trail.
Keeping Your Companions Happy: Maintenance Tips for Longevity
Your hiking poles are going to take a beating. They’ll get muddy, wet, dusty, and generally put through the wringer. Just like any other piece of essential gear, a little love and care go a long way in ensuring their longevity and reliable performance. Neglecting them can lead to sticky locks, corroded parts, or even structural failure at the worst possible moment. Trust me, you don’t want a pole to suddenly collapse when you’re depending on it for balance on a steep descent! Taking a few minutes after each major outing to clean and inspect them will dramatically extend their life and ensure they’re always ready for your next adventure. This isn’t just about saving money on replacements; it’s about maintaining trust in your equipment, which is paramount when you’re miles from anywhere. A well-maintained pole feels responsive and reliable, always ready to lend a hand (or a tip!).
A Little TLC Goes a Long Way: Post-Hike Cleaning
After every muddy or wet hike, I make it a habit to fully extend my poles and wipe down each section with a damp cloth to remove any dirt or grit. Pay particular attention to the locking mechanisms. For twist-lock poles, dirt inside the mechanism can cause them to seize up or lose their holding power. For lever-lock systems, make sure no debris is lodged under the levers. After cleaning, let them air dry completely, fully extended, before collapsing them for storage. This prevents moisture from getting trapped inside, which can lead to corrosion, especially in aluminum poles, or mildew on the grips. I’ve learned this the hard way after pulling out poles for a trip only to find them stiff and gritty because I rushed the drying process. A clean pole is a happy pole, and a reliable pole!
Inspecting for Wear and Tear: Prevention is Key
Regularly inspect your pole tips, baskets, and grips. Tips wear down over time, especially on abrasive surfaces like rock. Replacing worn tips before they completely disappear will protect the underlying carbide or steel and maintain traction. Check baskets for cracks, especially if you hike in snowy conditions where they prevent the pole from sinking too deep. Examine the straps for fraying or tears, and the grips for any damage or excessive wear. For adjustable poles, ensure all locking mechanisms are functioning smoothly and securely. If a section feels loose or sticky, try disassembling it (if your poles allow) to clean the interior. Addressing minor issues proactively can prevent them from becoming major problems down the trail. It’s like checking the tires on your car – a quick glance can save you a big headache later.
Making the Right Choice: A Quick Guide to Selecting Your Perfect Poles
Stepping into the world of hiking poles can feel a bit overwhelming with all the different materials, locking mechanisms, and features available. But don’t fret! Choosing the right pair for you is more about understanding your typical hiking environment, your budget, and what feels most comfortable in your hands. There’s no single “best” pole, only the best pole *for you*. I’ve tried several different types over the years, from basic aluminum to ultralight carbon fiber, and each has its own pros and cons. My first pair was a simple, affordable aluminum set, and they served me well for hundreds of miles. As I got more into backpacking and long-distance treks, I invested in a lighter, more compact pair. Thinking about these factors beforehand will help narrow down the choices and ensure you end up with companions that truly enhance your trail experience without breaking the bank.
| Feature | Consideration | My Takeaway |
|---|---|---|
| Material | Aluminum vs. Carbon Fiber | Aluminum is durable and more affordable, great for beginners or rough trails. Carbon fiber is lighter, reduces swing weight, and dampens vibrations but can be more brittle and pricier. My preference shifted to carbon fiber for longer treks to save energy. |
| Locking Mechanism | Lever Lock vs. Twist Lock | Lever locks (like FlickLocks) are quicker and easier to adjust, especially with gloves, and generally more reliable in cold/wet conditions. Twist locks are often more compact when collapsed but can seize up with dirt or cold. I lean towards lever locks for ease of use. |
| Grip Material | Cork vs. Foam vs. Rubber | Cork molds to your hand, manages sweat well, and is durable – my personal favorite. Foam is lightweight and comfortable but can absorb water. Rubber is good for cold weather but can cause blisters in hot, sweaty conditions. Comfort is key here! |
| Baskets | Small (Summer) vs. Large (Winter/Snow) | Most poles come with small, removable baskets suitable for general hiking. If you plan on snowshoeing or winter hiking, larger baskets are essential to prevent sinking too deep. Always make sure they’re interchangeable if you do both. |
Aluminum vs. Carbon Fiber: Balancing Durability and Weight
This is often the first big decision you’ll face. Aluminum poles are generally more robust and can withstand more abuse. If you’re prone to falling, or frequently find yourself in rocky, unforgiving terrain where poles might get bent, aluminum is a fantastic, reliable choice. They’re also typically more budget-friendly, making them a great entry point into the world of poles. Carbon fiber, on the other hand, is significantly lighter. This reduction in “swing weight” makes a huge difference over a long day of hiking, as you’re lifting and swinging those poles thousands of times. They also tend to absorb vibrations better, which can reduce hand fatigue. However, carbon fiber is more brittle than aluminum, meaning a sharp, direct impact could cause it to crack or snap, whereas aluminum might just bend. For ultralight backpackers or those prioritizing speed and minimal effort, carbon fiber is a dream, but for gnarly, technical terrain, I sometimes still grab my trusty aluminum set.
Locking Mechanisms: Smooth Adjustments on the Fly
You’ll primarily encounter two types: twist locks and lever locks (also known as flick locks or external clamps). Twist locks work by twisting the pole sections to expand an internal wedge, securing the sections. They’re usually more streamlined when collapsed, but I’ve found them to be finicky in cold weather, prone to seizing up with mud or grit, and sometimes just less reliable under heavy load. Lever locks, with their external clamps, are my personal preference. They’re incredibly quick and easy to adjust, even with gloves on, and you can visually confirm they’re securely locked. While they might add a tiny bit more bulk, the convenience and reliability, especially when you need to quickly shorten poles for an ascent or lengthen them for a descent, far outweigh any minor aesthetic considerations. Having the ability to make rapid adjustments without fumbling is a massive advantage on dynamic trails.
Wrapping Things Up
And there you have it, folks! My journey from a skeptical hiker to a full-blown pole evangelist has been a revelation, and I truly hope some of my experiences and tips resonate with you. What started as just another piece of gear has transformed into an indispensable companion, enhancing every aspect of my time on the trail. If you take one thing away from this deep dive, let it be this: don’t just carry your poles, embrace them. Integrate them into your stride, adjust them for the terrain, and learn to trust them as extensions of your own body. You’ll not only hike more efficiently and comfortably, but you’ll also protect your joints for countless adventures to come. It’s an investment in your hiking future, a subtle shift that unlocks a whole new level of enjoyment and capability in the great outdoors.
Extra Tips for the Trail
1. Don’t be afraid to constantly adjust your pole length throughout your hike. I can’t stress this enough! The “perfect” length on flat ground is rarely the perfect length for a grueling uphill or a steep, knee-jarring descent. Think of it like shifting gears on a bike – you wouldn’t stay in one gear the whole ride, right? Shorten them a few inches for climbs to maximize your push and keep your arms from over-extending, and then lengthen them a bit for descents to create a wider, more stable base of support and absorb more impact. This seemingly small adjustment is a game-changer for energy conservation and joint protection. It’s a dynamic tool, and learning to use its adjustability to your advantage is a hallmark of an experienced hiker. Trust me, your knees will thank you later for making these quick tweaks as the terrain dictates.
2. Understand your basket options and when to use them. Most poles come with small, removable baskets that are ideal for general trail use, preventing the pole tip from sinking too deep into soft earth or getting jammed between rocks. However, if you’re venturing into snowy conditions or on very soft, muddy ground, larger snow baskets are an absolute must. They provide significantly more flotation, preventing your poles from plunging deep and throwing off your balance or getting stuck. Swapping them out is usually a quick and easy process, and having the right basket for the conditions can make a huge difference in your stability and overall hiking enjoyment. I learned this the hard way on an early winter hike, constantly pulling my poles out of deep snowdrifts – never again without those bigger baskets!
3. Practice, practice, practice! While poles might seem intuitive, truly mastering their use takes a bit of time and conscious effort. Don’t wait until your big multi-day trek to break them out for the first time. Start on shorter, familiar trails with varied terrain – some inclines, some descents, maybe a few rocky sections. Focus on finding your rhythm, getting comfortable with the grip and strap, and experimenting with different techniques (diagonal stride, double plant). The more you integrate them into your natural movement, the less you’ll have to think about them, and the more they’ll become a seamless extension of your hiking style. I even started using mine on my daily dog walks just to build that muscle memory, and it paid off immensely on longer, more challenging trips.
4. Don’t underestimate the power of your core. While your arms are doing the pushing and bracing, a lot of the power and stability you get from hiking poles actually comes from engaging your core muscles. Think of your core as the central hub connecting your upper body to your lower body, transferring energy efficiently. When you push off your poles, consciously engage your abs and back muscles. This not only enhances your propulsion and stability but also helps protect your lower back from strain, especially when carrying a heavy pack. It’s a full-body workout in the best possible way, allowing you to hike stronger for longer. I noticed a huge difference in my endurance and reduced back fatigue once I started focusing on this connection.
5. Consider carrying spare tips and a small repair kit. Pole tips, especially carbide ones, wear down over time, particularly on abrasive surfaces like asphalt or hard rock. A worn-out tip significantly reduces traction and can even damage the underlying pole material. Carrying a spare set of rubber tips or carbide replacements can be a lifesaver, especially on long trips where you can’t easily find a gear shop. For adjustable poles, a small piece of duct tape or electrical tape can often temporarily fix a loose locking mechanism in a pinch. Being prepared for minor gear malfunctions is a hallmark of any seasoned hiker, and your poles are no exception. I always stash a few essentials in my repair kit – better safe than sorry, right?
Your Pole Power Playbook
So, what’s the big picture here? Hiking poles aren’t just an accessory; they’re a fundamental tool that can revolutionize your outdoor adventures. They’ll save your knees, boost your endurance, and significantly enhance your stability on everything from gentle strolls to challenging mountain climbs. Think of them as your personal shock absorbers, your extra set of legs for tricky terrain, and your secret weapon for maintaining a strong, steady pace. Mastering their use – from proper length adjustments to understanding the nuanced grip – will transform your hiking experience, allowing you to cover more ground with less fatigue and greater confidence. This isn’t just about going faster; it’s about going further, safer, and enjoying every single step along the way. Get out there, experiment, and discover the incredible difference they make!
Frequently Asked Questions (FAQ) 📖
Q: Why should I even bother with hiking poles if I’ve been hiking for years without them?
A: Oh, believe me, I totally get it! For the longest time, I was right there with you, thinking hiking poles were just an extra thing to carry or only for those hardcore mountaineers.
I used to pride myself on being able to tackle any trail ‘pole-free.’ But, and this is a huge but, my entire perspective shifted once I actually gave them a fair shot.
It wasn’t an instant love affair, but after a few hikes, I noticed a dramatic difference. My knees, which used to ache after a long descent, felt remarkably better.
It felt like I had four legs instead of two, giving me incredible stability, especially when crossing tricky stream beds or navigating rocky sections.
Plus, I found myself less fatigued at the end of the day. Those poles truly help distribute the effort, taking some strain off your legs and engaging your upper body in a way that just makes hiking feel more balanced and efficient.
It’s not about being ‘weak’ if you use them; it’s about being smart, extending your hiking life, and genuinely enjoying every single mile with greater comfort and confidence.
It’s a game-changer, plain and simple, and once you try them, you’ll wonder how you ever hiked without them.
Q: Okay, I’m convinced! But seriously, how do I actually use hiking poles correctly without looking totally awkward on the trail?
A: That’s a fantastic question, and honestly, it’s totally normal to feel a bit clumsy at first. I certainly did! The key is to think of your poles as an extension of your body, almost like extra legs that help propel you forward and maintain your balance.
First off, proper sizing is crucial. When you hold the pole with the tip on the ground, your elbow should form roughly a 90-degree angle. Adjust them for uphill by making them a little shorter to push off more effectively, and lengthen them for downhill to give yourself extra reach and absorb impact.
As for technique, generally, you want a natural opposing arm-and-leg swing, just like when you’re walking normally – left foot forward, right pole forward, and vice-versa.
Don’t grip them too tightly; a relaxed hold with the wrist strap properly adjusted (coming up from underneath) will save your hands from fatigue. On flat ground, it’s a gentle rhythm.
Uphill, use them to push and drive yourself up. Downhill, plant them ahead of you to brace and absorb shock, protecting your knees. It might feel a bit awkward initially, but trust me, after a couple of miles, it’ll start to feel incredibly natural, and you’ll be zipping along with newfound grace and power.
Q: Are hiking poles just for super tough, multi-day treks, or can I benefit from them on my regular day hikes too?
A: This is a common misconception, and I’m so glad you asked! Many people assume hiking poles are exclusively for Everest expeditions or epic thru-hikes, but that couldn’t be further from the truth.
While they are indispensable for those grueling adventures, I’ve found them incredibly beneficial on even my shortest, most ‘casual’ day hikes. Think about it: every time you step on uneven terrain, whether it’s a root-filled path, a rocky incline, or just a muddy patch after a rain, those poles are there providing instant stability.
They significantly reduce the cumulative stress on your knees and ankles, which adds up even on a five-mile walk. For me, they’ve been amazing on local trails that have surprising elevation changes or slippery leaves in the fall.
It’s like having a little extra insurance against a stumble, and honestly, they just make me feel more secure and confident no matter the trail. So, whether you’re tackling a peak or just enjoying a stroll through your favorite state park, hiking poles are a fantastic investment in your comfort, safety, and the longevity of your hiking journey.
Give them a try on your next regular hike; you might be surprised how much they enhance the experience!