Hey there, fellow adventurers! There’s nothing quite like hitting the trails, feeling the sun on your face, and the fresh air filling your lungs. But let’s be real, a bad hiking backpack can turn that dream day into a real drag.
I’ve personally been there, trying to enjoy breathtaking views while my shoulders screamed for mercy because I picked the wrong pack. With so many innovative options out there, from ultralight wonders with anti-gravity suspension systems to robust multi-day beasts designed for heavy loads, finding “the one” can feel like a mountain to climb in itself.
Trust me, investing a little time in choosing the right gear, considering factors like capacity, fit, and even smart features like built-in solar panels, makes all the difference for comfort, safety, and ultimately, your enjoyment on any adventure, big or small.
Want to know how to nail that perfect fit and function for your next trek? Let’s unpack everything you need to know below!
Understanding Your Adventure Style
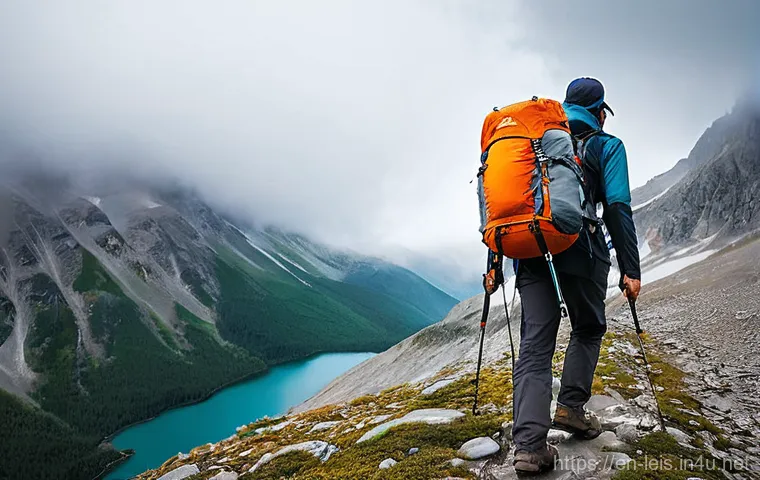
Okay, let’s get real for a second. The absolute first step, the make-or-break moment in choosing your hiking pack, isn’t about fancy features or how many liters it holds. It’s about looking deep into your adventuring soul and truly understanding what kind of escapades you’re planning. I remember this one time, I was so excited for a quick day hike through the Redwoods, but I grabbed my old multi-day pack out of habit. It was overkill, felt clunky, and honestly, it just got in the way of me fully enjoying those majestic trees. On the flip side, I once tried to cram a weekend’s worth of gear into a daypack for a spontaneous overnight trip in the Rockies – spoiler alert, it didn’t work, and I ended up strapping half my stuff to the outside, looking like a poorly organized sherpa. The point is, different adventures demand different beasts. A casual stroll on a paved trail requires a completely different setup than traversing a rugged, off-trail mountain pass, or a multi-day backpacking trip where every ounce and cubic inch counts. Think about the duration, the expected conditions, and what absolute essentials you’ll be carrying. Are you a minimalist who thrives on light and fast movements, or do you prefer to bring along those ‘just in case’ items that offer peace of mind? This foundational self-assessment will guide every other decision you make, ensuring your pack is an extension of your body, not a burden.
Day Trips vs. Multi-Day Expeditions
The distinction here is colossal, truly. For a simple day hike, you’re primarily looking at carrying water, snacks, a first-aid kit, perhaps a light jacket, and maybe a camera. A pack in the 15-30 liter range is usually perfect – something streamlined that won’t feel heavy or bulky. It should allow you to move freely, duck under branches, and navigate crowds if you’re on a popular trail. My personal preference for day hikes often leans towards packs with easy-access pockets for my phone or a water bottle, so I don’t have to stop and rummage. But when you step into the realm of multi-day expeditions, you’re suddenly talking about tents, sleeping bags, cooking gear, extra layers of clothing, more substantial food, and possibly even specialized equipment like climbing ropes or snowshoes. For these adventures, you’re typically eyeing packs in the 45-75+ liter range. These are designed to distribute heavier loads comfortably, often featuring more robust frames, padded hip belts, and numerous compression straps to stabilize your gear. Getting this capacity right is crucial; too small, and you’ll be leaving essentials behind or awkwardly attaching things to the outside; too large, and you’ll be tempted to overpack, adding unnecessary weight.
Terrain and Climate Considerations
Beyond just the duration, the environment you’ll be exploring plays a massive role in backpack selection. If you’re frequently hiking in wet, rainy climates like the Pacific Northwest, water resistance isn’t just a nice-to-have; it’s a non-negotiable. You’ll want packs made from durable, water-repellent fabrics, or at the very least, a pack that comes with an integrated rain cover. On the other hand, if your adventures take you to arid, hot deserts, breathability becomes paramount. You’ll appreciate ventilated back panels and lighter fabrics that help minimize sweat. The terrain itself also dictates design choices. If you’re scrambling over rocks or pushing through dense brush, a pack with a sleek profile and fewer external straps that can snag is preferable. For winter excursions or alpine climbs, you might need specific attachment points for ice axes, skis, or crampons. Think about the wear and tear your pack will endure; rougher terrain demands tougher materials. I’ve seen friends utterly shred flimsy packs on granite trails, a painful lesson in matching gear to environment.
The Art of Capacity Calculation
Honestly, figuring out the right capacity for a hiking backpack can feel like a dark art sometimes. You see numbers like “40L” or “65L” splashed across descriptions, and it’s easy to think bigger is always better, right? Wrong! I’ve fallen into that trap myself, convincing myself I *needed* a massive pack for a trip that ultimately required far less. What often happens is that if you have space, you’ll fill it, even if with unnecessary items, leading to a heavier load and a less enjoyable hike. The real trick is to be brutally honest about what you genuinely need, not what you *might* need. Start by laying out all your essential gear: your sleeping system, cooking setup, clothing, first aid, water filtration, and personal items. Then, visualize how those items will fit into a pack. This isn’t just about volume; it’s about the shape and compressibility of your gear. A bulky sleeping bag takes up a lot of room, even if it’s light. Modern gear tends to be more compact, which means you might get away with a smaller pack than you think. Trust me, every liter you save translates to a lighter pack, and a lighter pack means more energy for soaking in those incredible views or pushing that extra mile.
The Liters Game: What Do They Really Mean?
When manufacturers talk about “liters,” they’re referring to the total internal volume of the pack’s main compartments and usually all the external pockets combined. A 20-30 liter pack is typically great for day hikes, providing enough space for water, snacks, a jacket, and maybe a small camera. Step up to 30-50 liters, and you’re entering the realm of extended day hikes or ultralight overnighters, especially if your gear is compact. For weekend trips or longer, where you’re carrying a tent, sleeping bag, and cooking gear, you’ll generally be looking at 45-65 liter packs. And if you’re planning on multi-day expeditions, winter camping, or carrying specialized group gear, 70 liters and above might be your sweet spot. It’s not a rigid science, but more of a guideline. For instance, I know my bulky winter sleeping bag alone takes up about 15 liters, so I always factor that into my winter pack choices. Don’t just pick a number blindly; think about the actual size and shape of your biggest items. If you can, try to physically load your actual gear into a potential pack at a store. It’s the best way to get a real feel for whether everything fits comfortably without having to play Tetris every morning on the trail.
Packing Philosophy: Minimalist or Prepared-for-Anything?
This is where your personal hiking philosophy really comes into play. Are you the type who embraces the “fast and light” mantra, meticulously weighing every item and cutting off toothbrush handles to save grams? Or are you more of a “better safe than sorry” adventurer, preferring to carry a few extra comfort items or emergency supplies, even if it adds a bit of weight? Both approaches are valid, but they significantly impact your pack choice. A minimalist might opt for an ultralight, frameless pack that collapses down when not full, valuing every ounce saved. These packs often have fewer features and less padding but make up for it in agility. On the other hand, the prepared-for-anything hiker might prefer a pack with a robust internal or external frame, more generous padding, and a plethora of pockets and attachment points. These packs are designed to comfortably carry heavier loads over longer distances, offering more organization options and better support. I used to be strictly in the “prepared-for-anything” camp, but after years of sore shoulders, I’ve gradually shifted towards a more mindful, lighter packing style. It’s a journey, not a destination, and your pack should evolve with you.
Dialing In Your Fit: It’s More Than Just Straps
Let’s be brutally honest: you can have the most expensive, feature-packed backpack in the world, but if it doesn’t fit you properly, it’s going to make your hike miserable. I mean, truly miserable. I once loaned a friend a pack that was a size too big for him, thinking “it’ll be fine.” He spent the entire trip constantly adjusting, complaining about chafing, and finally, just looking utterly defeated. It was a stark reminder that fit isn’t a luxury; it’s a fundamental necessity. Many people assume they can just grab any pack and adjust the shoulder straps, but that’s like trying to fit a square peg in a round hole. A properly fitted backpack should feel like an extension of your body, distributing the weight efficiently, primarily onto your hips, not just your shoulders. This means understanding your own body measurements – especially your torso length – and how the pack’s suspension system interacts with your anatomy. It’s not just about comfort; it’s about preventing injuries, maintaining good posture, and maximizing your endurance on the trail. Don’t skip this step, and don’t be afraid to spend some time at a specialty outdoor store getting measured and trying on different models with weight in them. It’s the best investment you’ll make in your hiking comfort.
Torso Length and Hip Belts: Your Pack’s Foundation
The two most critical components for a proper fit are your torso length and the hip belt. Most quality hiking packs come in different sizes (S, M, L) based on torso length, which is the distance from your C7 vertebra (the bony protrusion at the base of your neck) down to the top of your hip bones. This measurement is absolutely paramount, as it determines where the shoulder straps originate and where the hip belt will sit. A properly positioned hip belt should wrap around the top of your hip bones, with about 70-80% of the pack’s weight resting directly on them. This shifts the load from your shoulders, which are ill-equipped to carry heavy weight over long distances, to your stronger leg muscles. If the hip belt is too high or too low, it won’t effectively transfer the weight, leaving your shoulders to bear the brunt. Similarly, the shoulder straps should gently hug your shoulders, without any gaps or excessive pressure points. They’re primarily for stability and pulling the pack close to your body, not for carrying the bulk of the weight. Many packs also have adjustable torso lengths, allowing for fine-tuning, but starting with the correct base size for your body is key. If you’re unsure, get measured by a professional!
Loading Up and Adjusting On the Fly
Once you’ve got a pack that matches your torso length, the real magic happens with the adjustments. This isn’t a “set it and forget it” kind of deal. A properly loaded pack requires careful adjustment of all its straps. Start by loosening everything. Then, put the pack on, making sure the hip belt is centered over your hip bones, and tighten it snugly. It should feel secure, almost like a hug. Next, pull the shoulder straps down and back until they’re snug but not tight – remember, they’re not carrying the main load. The load lifter straps, located on top of your shoulder straps and attaching to the top of the pack, are your secret weapon. Tightening these brings the pack closer to your body, preventing it from pulling backward and off-balancing you. Finally, adjust the sternum strap across your chest; this pulls the shoulder straps inward, preventing them from digging into your armpits and stabilizing the pack. What many don’t realize is that these adjustments should be re-evaluated as you hike. As your pack empties or as you traverse different terrain, a quick tweak to the load lifters or hip belt can make a world of difference in comfort. I’ve found that regularly adjusting these throughout a long day prevents hotspots and fatigue.
Material Matters: Weathering the Elements
When you’re out on the trail, your backpack isn’t just a container for your gear; it’s often the first line of defense against the elements. The material your pack is made from plays a huge role in its durability, weight, and how well it protects your precious cargo from rain, abrasion, and punctures. I once had a cheap, thin pack whose fabric tore just by rubbing against a sharp rock – all my snacks ended up scattered down a hillside! It was a lesson learned the hard way about not skimping on material quality. Most hiking backpacks are constructed from synthetic fabrics like nylon or polyester, often treated with a Durable Water Repellent (DWR) coating. These materials are chosen for their strength-to-weight ratio and resistance to the elements. However, not all nylon is created equal, and understanding the nuances of these fabrics can help you choose a pack that will truly stand up to your adventures, whether you’re bushwhacking through thorny trails or just need something lightweight for urban explorations. The weave, the coating, and even the type of thread used can make a massive difference in how long your pack will last and how well it performs in various conditions.
Denier Demystified: Strength vs. Weight
You’ll often see numbers like “210D,” “500D,” or “1000D” in backpack specifications, especially when discussing nylon or polyester fabrics. This “D” stands for Denier, which is a unit of measurement for the linear mass density of fibers. In simpler terms, a higher denier number indicates a thicker, heavier, and generally more durable fabric. For instance, a 210D nylon is lightweight and often used for less critical areas or ultralight packs where every gram counts. It’s more prone to abrasion but significantly lighter. A 500D fabric strikes a good balance between weight and durability, making it a common choice for main pack bodies. When you get to 1000D, you’re looking at incredibly rugged, heavy-duty material, often found in expedition packs or in high-wear areas like the bottom of a pack. While a higher denier means more resistance to tears and punctures, it also means more weight. So, it’s a constant trade-off. For me, a balance around 400-600D in the main body and maybe 800-1000D on the base is ideal for most rugged multi-day trips, ensuring it can take a beating without weighing me down excessively.
Waterproofing Wonders and Rain Covers
Let’s talk about rain, because eventually, you’re going to encounter it. No matter how much you check the forecast, Mother Nature has a way of surprising us. While many pack fabrics have a DWR coating that causes water to bead up and roll off, this isn’t true waterproofing. Over time, or with heavy rain, water will eventually saturate the fabric. True waterproofing often involves a PU (polyurethane) or silicone coating on the inside of the fabric, which creates a barrier. However, even these materials have their limits, and seams are always a potential weak point unless they’re taped or welded. For ultimate protection, especially if you’re carrying electronics or anything sensitive to moisture, a pack liner (a large, heavy-duty garbage bag works wonders in a pinch!) or a dedicated rain cover is your best friend. Many packs come with integrated rain covers that stow away in a small pocket, which is super convenient. I always carry one, even if the forecast looks clear. It’s a small, lightweight insurance policy that has saved my gear from becoming waterlogged more times than I can count. Don’t rely solely on a pack’s “water-resistant” claim if you expect to face serious downpours.
| Feature | Benefit | Common Use Case |
|---|---|---|
| Adjustable Torso Length | Ensures a perfect fit for various body types, optimizing weight distribution to hips. | Hikers sharing a pack, or those with non-standard torso lengths. |
| Hydration Sleeve & Port | Easy access to water without stopping, encouraging consistent hydration. | Day hikes, fast-paced activities, or multi-day trips where water is critical. |
| Load Lifter Straps | Pulls the top of the pack closer to your body, improving balance and reducing shoulder strain. | Steep ascents/descents, maintaining comfort over long distances. |
| Hip Belt Pockets | Convenient storage for snacks, phone, or small essentials, accessible on the go. | Any hike where quick access to small items is desired. |
| Compression Straps | Stabilizes the load and reduces pack volume when not fully loaded, preventing gear from shifting. | Varying load sizes, or cinching down gear on rough terrain. |
| Integrated Rain Cover | Quick and easy protection from unexpected downpours, keeping gear dry. | Any climate with potential for rain, offering peace of mind. |
Smart Features That Make a Difference
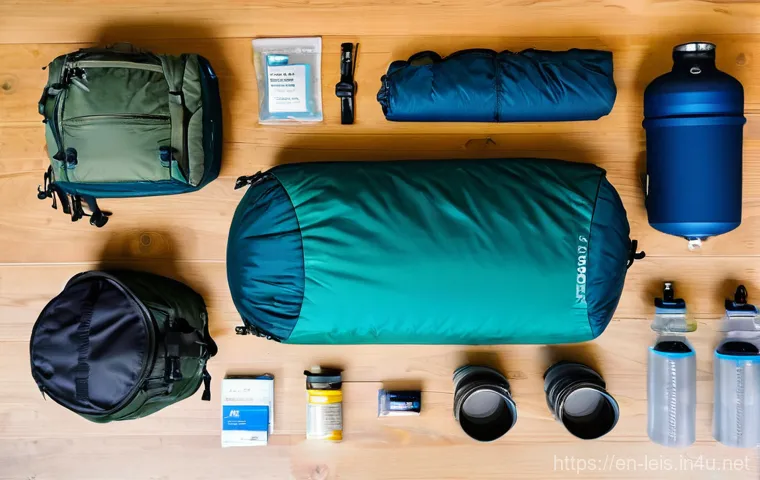
Beyond the core elements of capacity, fit, and material, modern hiking backpacks are bristling with clever features designed to make your time on the trail easier, safer, and more enjoyable. It’s easy to get overwhelmed by the sheer number of bells and whistles, and truthfully, not every feature is going to be essential for every hiker. However, identifying the ones that genuinely align with your hiking style and needs can elevate your experience from good to absolutely fantastic. I remember when I first got a pack with dedicated hip belt pockets. It felt like a revelation! No more stopping to dig for my phone or a snack; everything was right there, at my fingertips. These seemingly small innovations can add up to significant convenience and efficiency, saving you time and energy on the trail. From hydration sleeves that keep you hydrated without missing a beat to external attachment points that let you carry odd-shaped gear, thinking about these smart features can really tailor your pack to be the ultimate companion for your specific adventures.
Hydration Systems and Easy Access Pockets
One of my absolute favorite features in modern packs is the integrated hydration sleeve, often paired with an exit port for a drinking tube. Gone are the days of fumbling with water bottles or asking a friend to grab yours from the side pocket. With a hydration reservoir nestled comfortably inside your pack and a tube clipped to your shoulder strap, you can sip water effortlessly throughout your hike. This continuous hydration is a game-changer for maintaining energy levels and preventing dehydration, especially on strenuous climbs or in hot weather. I’ve personally found that I drink much more water when it’s readily accessible, which always makes me feel better on long treks. Equally important are those easy-access pockets. Hip belt pockets are invaluable for stashing your phone, a small camera, sunscreen, lip balm, or a quick energy bar – anything you need without having to take off your pack. Some packs also feature large stretch pockets on the front or sides, perfect for wet rain gear, extra layers, or larger water bottles that you might want to grab quickly. These thoughtful placements save so much time and effort, letting you stay focused on the trail ahead.
External Attachment Points and Gear Loops
Sometimes, your gear just won’t fit inside, or you need certain items quickly accessible without opening your pack. That’s where external attachment points become incredibly useful. Many packs come equipped with daisy chains (loops of webbing), ice axe loops, trekking pole attachments, and various compression straps that double as extra lashing points. These allow you to secure items like sleeping pads, tents, snowshoes, or even your muddy hiking boots to the outside of your pack, keeping them separate from your clean gear. I can’t tell you how many times I’ve used my pack’s external loops to carry my trekking poles when I needed my hands free for scrambling, or to strap a damp tent to the outside so it could air out a bit. Just be mindful of how you attach things externally; you want to make sure they’re secure, balanced, and not swinging wildly or snagging on branches. A well-designed pack offers a variety of these attachment options, giving you the flexibility to adapt to different loads and different types of adventures. It’s all about maximizing your carrying capacity and keeping your essential gear where you need it, when you need it.
Budgeting for Your Back’s Best Friend
Let’s be real, hiking backpacks can range from surprisingly affordable to eye-wateringly expensive, and navigating that price spectrum can feel like trying to find your way through a dense fog. It’s tempting to just grab the cheapest option, or conversely, to assume that the most expensive pack is automatically the best. However, neither of these approaches is particularly wise. I’ve made the mistake of buying a super cheap pack that fell apart after a few trips, forcing me to buy another one anyway – essentially costing me more in the long run. On the other hand, I’ve also splurged on a pack with features I rarely used, realizing I could have saved a decent chunk of change. The key is to see your backpack not as a simple purchase, but as an investment in your comfort, safety, and overall enjoyment of the outdoors. A good pack, properly cared for, can last you for years, enduring countless adventures. So, rather than just looking at the price tag, consider the value you’re getting, the quality of construction, and how well it meets your specific needs. There’s a sweet spot for everyone, and finding it means doing a bit of research and prioritizing what truly matters to you on the trail.
Investment vs. Expense: Where to Spend Wisely
When you’re looking at different price points, think about where your money is actually going. Higher-priced packs typically use more advanced, lighter, and more durable materials, feature more sophisticated suspension systems (which directly impacts comfort and load distribution), and often come with a better warranty or customer support. These are the areas where spending a little extra can truly pay off. A robust frame, quality zippers, and strong buckles are details that might not seem important until they fail on the trail. On the flip side, some expensive packs boast a myriad of niche features that you might never use. So, if you’re a casual day hiker, you likely don’t need the expedition-grade frame and arctic-rated materials of a professional mountaineering pack. For those starting out or with a tighter budget, look for packs from reputable brands that focus on core functionality: good fit, decent materials, and comfortable suspension. You might sacrifice a few bells and whistles, but you’ll still get a reliable pack. I always tell friends to invest in a pack with a good suspension system and durable fabric, even if it means foregoing some of the fancy pockets initially. Your back will thank you.
Second-Hand Gems and Sales Season Secrets
Don’t be afraid to think outside the box when it comes to snagging a great deal on a hiking backpack! The second-hand market can be an absolute treasure trove for high-quality gear that still has plenty of life left in it. Check out online marketplaces, local gear swaps, and consignment shops. Many outdoor enthusiasts upgrade their gear regularly, meaning you can often find lightly used packs from top brands at a fraction of their original price. Just be sure to inspect any used pack thoroughly for damage like tears, broken zippers, or worn-out padding. Another fantastic strategy is to time your purchase with sales seasons. Major holidays like Black Friday, Cyber Monday, and end-of-season clearances (often late summer/early fall or late winter) are prime times to find significant discounts on new gear. Sign up for newsletters from your favorite outdoor retailers; they’ll often give subscribers early access to sales or exclusive discount codes. Patience can definitely pay off here. I’ve managed to get some incredible deals on premium packs just by waiting for the right sale, proving that you don’t always have to break the bank to get an excellent, reliable hiking companion.
Maintenance and Longevity Tips
So, you’ve invested in a fantastic hiking backpack that fits like a dream and is ready for adventure. That’s awesome! But getting the right pack is only half the battle. To ensure your “back’s best friend” stays with you for countless miles and many years to come, a little bit of tender loving care goes a very long way. Neglecting your pack can lead to premature wear and tear, compromised performance, and ultimately, a much shorter lifespan. I’ve seen hikers just toss their muddy, sweaty packs into a corner after a trip, only to discover mildew, weakened fabric, or rusted zippers later on. It’s heartbreaking, and entirely preventable! Think about all the elements your pack endures: dirt, sweat, rain, sun, sharp rocks, and abrasive surfaces. A small amount of effort after each adventure can prevent major issues down the line and keep your pack looking and performing its best. Proper cleaning, smart storage, and addressing minor issues promptly are the keys to unlocking years of reliable service from your hiking companion. Trust me, a little love for your gear pays huge dividends.
Cleaning and Storage Hacks
After every significant hike, take a few minutes to clean your pack. Start by emptying everything out and shaking any loose dirt or debris. For general cleaning, a soft brush or a damp cloth with mild soap (like a gentle dish soap) is usually all you need. Focus on areas that get particularly dirty, like the hip belt, shoulder straps, and the bottom of the pack. Avoid harsh detergents or putting your pack in a washing machine, as this can damage the fabric coatings, zippers, and structural components. Rinse thoroughly and, this is crucial, hang it upside down in a well-ventilated area to air dry completely. Never store a damp pack, as this is a guaranteed recipe for mold and mildew, which can destroy fabrics and leave a lingering, unpleasant odor. When it comes to storage, find a cool, dry place away from direct sunlight, which can degrade fabric and elastic over time. Stuffing the pack lightly with old clothes or newspaper can help it maintain its shape, especially for packs with internal frames, preventing creases and pressure points from forming over long periods of non-use. Proper storage helps maintain the integrity of the materials and suspension system.
Minor Repairs and DIY Fixes
Even with the best care, adventures can be tough on gear, and small issues can crop up. Don’t panic if you notice a loose stitch, a minor tear, or a finicky zipper! Many of these common problems are easily fixable, often with just a few basic tools. For small tears in the fabric, a gear repair patch (often found at outdoor stores) or even a strong adhesive like Seam Grip can prevent the tear from spreading. A sewing kit with heavy-duty thread and a strong needle can mend loose seams or reattach webbing that’s come undone. For sticky zippers, a little bit of zipper lubricant or even just rubbing a pencil lead along the teeth can often work wonders. The key is to address these minor issues as soon as you notice them. A small tear left unchecked can quickly become a large, irreparable rip. Carrying a small repair kit with you on longer trips is also a smart move, allowing you to make quick, trailside fixes that can save your adventure. Learning a few basic DIY repair skills not only saves you money but also gives you a deeper appreciation for your gear and a sense of self-reliance on the trail.
Wrapping Things Up
Alright, my fellow adventurers, we’ve covered a lot of ground today, haven’t we? Choosing the perfect hiking backpack truly is an art, a deeply personal decision that intertwines with your unique style of exploring.
It’s more than just a piece of gear; it’s an investment in your comfort, your safety, and ultimately, your joy on the trail. Take the time, do the research, and most importantly, listen to what your body and your adventurous spirit are telling you.
When you find that pack that just *clicks*, it transforms from a burden into a trusted partner, quietly supporting every step of your journey. So, go forth, armed with this knowledge, and may your next adventure be your best one yet!
Useful Information for Your Next Adventure
1. Always Do a “Trial Pack” Before You Buy: This might sound like extra work, but trust me, it’s a game-changer. Head to an outdoor specialty store and ask if you can load up a potential pack with some weighted items (most good stores have sandbags or weighted pillows for this). Better yet, bring some of your actual bulky gear – your sleeping bag, your tent, your heaviest water bottle. Feel how it sits on your hips, how the weight distributes, and if anything digs in. Walk around the store for a good 15-20 minutes. I once bought a pack that felt great empty, but as soon as I loaded it for a weekend trip, it became an absolute nightmare to carry, the shoulder straps pulling awkwardly. Learning from that mistake, I now insist on a weighted test. This crucial step helps simulate real-world conditions and ensures you’re not just buying a bag, but investing in comfort and performance that actually suits your body and your gear. You wouldn’t buy a car without a test drive, right? Treat your pack with the same diligence.
2. Consider a Modular Approach for Versatility: For many hikers, one pack simply doesn’t cut it for every single type of adventure. Instead of trying to find a “one-size-fits-all” mythical pack, think about building a small quiver of packs. Perhaps a smaller, lightweight daypack (15-25L) for quick outings or summit bids from a base camp, a medium-sized overnight/weekend pack (40-55L) for most of your multi-day trips, and then a larger expedition pack (65L+) if you frequently do winter camping, longer thru-hikes, or carry specialized group gear. I started with one “all-rounder,” but quickly realized it was either overkill for short hikes or just barely adequate for longer ones. Investing in two well-chosen packs (e.g., a daypack and a multi-day pack) can offer far more versatility and comfort across your different adventures than one pack trying to do everything poorly. This strategy, while seemingly more expensive upfront, often saves money in the long run by reducing wear and tear on an ill-suited pack and making every trip more enjoyable.
3. Don’t Skimp on Pack Accessories (The Unsung Heroes): While the pack itself is the star, don’t overlook the supporting cast of accessories that can dramatically enhance its functionality and your overall experience. A good quality pack cover is a non-negotiable for anyone hiking in unpredictable weather, saving your gear from an unexpected downpour. Compression stuff sacks for your sleeping bag and clothing can dramatically reduce volume, allowing you to fit more into a smaller pack or simply stabilize your load better. A small, lightweight repair kit (duct tape, safety pins, needle and thread, zipper lubricant) can be a lifesaver for trailside fixes, preventing a minor issue from becoming a trip-ender. I also swear by internal dry bags or waterproof stuff sacks for electronics and critical items, providing an extra layer of protection even with a rain cover. These small additions are often relatively inexpensive but offer immense peace of mind and practicality, truly making your pack a more versatile and reliable companion.
4. Embrace Customization – Your Pack Should Evolve With You: The beauty of many modern hiking packs is their ability to be customized and adapted to your specific needs. Don’t feel like you have to use every strap or pocket exactly as the manufacturer intended. Experiment with different ways to attach gear externally. For example, some packs allow you to remove the top lid to use as a summit pack, or convert the hip belt into a standalone lumbar pack for short excursions from camp. Many offer adjustable ice axe loops or daisy chains that can be used for securing anything from a solar panel to wet socks. As your hiking style changes, or as new gear comes into play, your pack can often adapt. I’ve personally re-routed compression straps, added extra carabiners, and even temporarily removed pockets I didn’t need for a particular trip. Think of your pack as a customizable platform; with a little creativity, you can tweak it to perfectly suit your evolving adventures and preferences.
5. Your Body’s Feedback is the Ultimate Guide: At the end of the day, all the technical specifications and expert reviews in the world can’t tell you how a pack will *feel* on your unique body. Your personal comfort is paramount. If a pack is constantly causing hot spots, chafing, or undue pressure, it’s not the right pack for you, no matter how highly rated it is. Pay attention to how your shoulders, hips, and lower back feel after wearing a loaded pack for an extended period. Don’t try to “tough it out” or convince yourself you’ll get used to discomfort; you won’t, and it will only detract from your enjoyment. I learned this the hard way on a multi-day trip where a slight mis-fit became unbearable by day two, affecting my mood and energy. Trust your instincts and your physical sensations above all else. A comfortable pack is a pack you’ll actually want to use, and that’s the real secret to happy hiking.
Key Takeaways for Your Hiking Pack Choice
Choosing the right hiking backpack boils down to a few critical elements: fit is non-negotiable, ensuring comfort and preventing injury by correctly matching your torso length and utilizing the hip belt for primary weight transfer. Your pack’s capacity must align with your adventure style and duration, preventing both overpacking and leaving essentials behind. The materials dictate durability and weather resistance, so consider denier ratings and waterproofing for the terrains you frequent. Smart features like hydration sleeves and external attachment points can significantly enhance convenience and efficiency on the trail. Finally, view your backpack as an investment in your outdoor enjoyment, ensuring proper maintenance and considering the value over just the price. A well-chosen, well-fitted, and well-cared-for pack will be your most reliable companion through countless adventures.
Frequently Asked Questions (FAQ) 📖
Q: How do I figure out the right capacity (liter size) for my hiking adventures?
A: Oh, this is such a common head-scratcher, and trust me, I’ve made every mistake in the book when it comes to pack size! I remember once trying to squeeze a full weekend’s gear into a tiny daypack, and another time hauling a behemoth for a simple afternoon stroll – both equally miserable.
The golden rule here is to match your pack’s capacity to the length and nature of your trip. For those lovely day hikes where you’re just carrying water, snacks, a light jacket, and maybe a camera, something in the 10-30 liter range is usually perfect.
Think Osprey Talon or Deuter Speed Lite. When you start venturing into overnight or even quick weekend trips, especially if you’re tenting, you’ll want to jump up to 30-50 liters.
This gives you space for a sleeping bag, a small tent, a cooking system, and extra layers. My personal sweet spot for a flexible weekend warrior pack is around 40L – it feels just right.
And for those epic multi-day expeditions, where you’re truly self-sufficient, we’re talking 50 liters and up, sometimes even 70+ liters for winter trips with bulkier gear.
It really boils down to your gear list. Lay out everything you plan to take, and then imagine fitting it into your chosen pack. Don’t forget that “just in case” layer that always seems to find its way in!
Q: What’s the secret to getting a hiking backpack to fit perfectly? I always feel like something’s off!
A: This is hands-down the MOST critical aspect of backpack comfort, and it’s where many people go wrong. I used to think a backpack was just a bag you threw over your shoulders, but oh, how wrong I was!
It’s all about load distribution. The secret lies in a proper fit, mainly centered around your torso length and hip belt. First, measure your torso length.
Many outdoor stores can help with this, or you can find guides online. Most quality packs come in different torso sizes or have adjustable systems. Once you have the right size pack, the hip belt is your best friend – it should sit comfortably over your iliac crest (the top of your hip bones), bearing about 70-80% of the pack’s weight.
Cinch it snug, but not painfully tight. Next, adjust the shoulder straps so they curve comfortably over your shoulders without gaps or digging in. Then come the load lifters, those small straps above your shoulders connecting the pack to the harness.
Tighten them slightly to pull the top of the pack closer to your body, preventing it from flopping backward. Finally, the sternum strap across your chest helps stabilize the load and takes pressure off your shoulders.
I remember the first time a salesperson properly fitted a pack for me; it felt like magic! Suddenly, a heavy pack felt manageable. Always try on a pack with some weight in it (the store should have sandbags) to truly feel how it carries.
Q: Beyond capacity and fit, what are some “must-have” features or clever extras I should look for in a hiking backpack?
A: Okay, once you’ve nailed capacity and fit, it’s time for the fun stuff – features! Having the right features can elevate your hiking experience from good to absolutely glorious.
My absolute non-negotiable “must-have” is a dedicated hydration sleeve and port. Fumbling for a water bottle in the main compartment is a pain, and staying hydrated easily is key.
Hip belt pockets are another game-changer for me. I love having quick access to snacks, my phone, or a small map without having to stop and take off my pack.
Seriously, once you have them, you’ll wonder how you ever lived without them! Look for external attachment points or daisy chains if you often carry extra gear like trekking poles, an ice axe, or even a rolled-up foam pad.
A built-in rain cover is a massive bonus, saving you from a soggy mess when unexpected showers hit. Ventilation, especially a good mesh back panel, is a godsend in warmer climates – it keeps your back from becoming a sweaty mess.
Some packs even have a separate sleeping bag compartment at the bottom, which is super handy for quick access. And here’s a pro tip: I always check for a large, easily accessible front or side stretch pocket.
Perfect for stashing a wet rain jacket or a quick layer you might need. These little details might seem minor, but they seriously add up to a much more enjoyable and efficient trek!